
Square(ish) Bottomed Hobo Lunchbag Tutorial
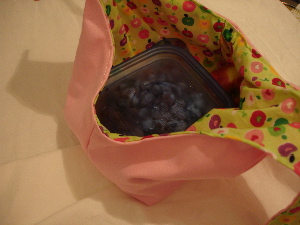
Necessity being the mother of invention, I first made this bag because I wanted something that would have all the features of a plastic bag, except I wouldn’t want to throw it out. The features I really wanted were: ability to hold a square container in an upright position, tie-able, light, washable and squishable. Also cute. And so the Square(ish) Bottomed Hobo Lunchbag was born.
Materials Needed:
- Pattern paper
- Ruler
- 1/2 yard outer fabric
- 1/2 yard lining fabric
- matching thread
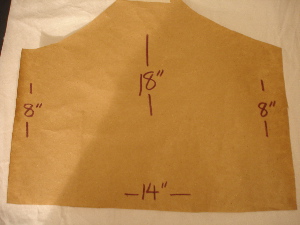
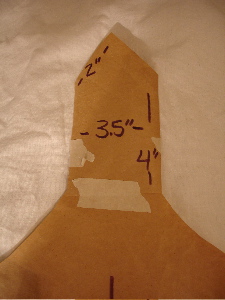
Step One:
Cut paper pattern, 14” bottom, 8” sides, cut a freehand curve for about 5.5” to the handle, which is 3.5” wide and 4” high.
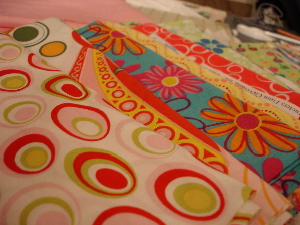
Step Two:
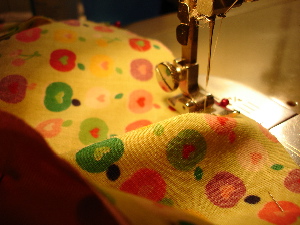
Select scrumptious, easy to wash, fabrics for your lovely lunch bag.
Step Three:
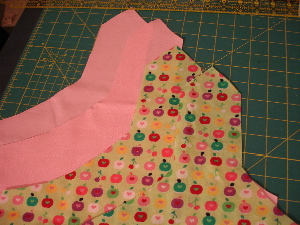
Fold lining fabric in half carefully and pin pattern to both layers.
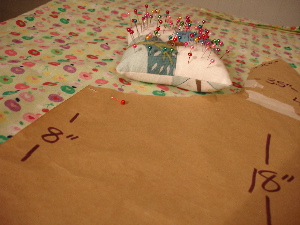
Cut around pattern. Repeat with outer fabric. You should now have four pieces that resemble little schoolhouses.
Step Four:
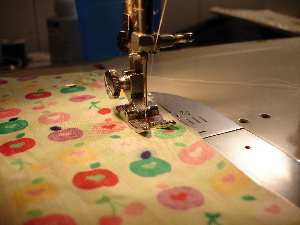
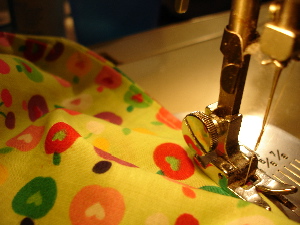
Pin lining pieces together, right sides facing in. Sew down both 8” sides and across the bottom using a 1/2” seam allowance. Leave a gap of 2-3” on the bottom seam. DON’T FORGET the gap, picking this out later is a real pain! Remove pins. Trim thread.
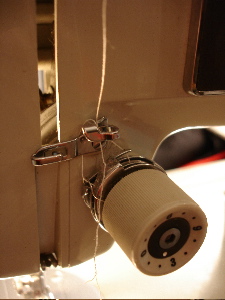
My sewing machine had a delightful little thread implosion meltdown here. No project ever goes smoothly. * Note to self: do not adjust tension while sewing.
Step Five:
Repeat step 4 with outer fabric, sewing across entire bottom.
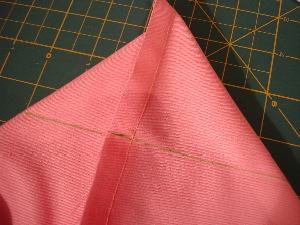
Step Six:
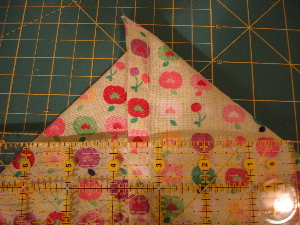
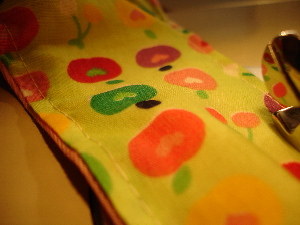
Now we make the squared bottom. (feel free to giggle, I am immature enough to think ‘squared bottom’ is funny too!) Fold the corner into a triangle with a seam running down the middle. Measure the preferred width for your bottom. :o) I chose 6” because that fits the square containers I always use for my lunches.
Do this for all four corners.
Step Seven:
Trim off the little elf hats to make a straight line across. About 1/2-3/4” is good.
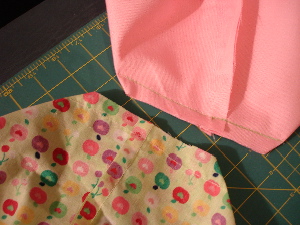
Turn the bag lining inside out and tuck it into the outer bag so that right sides are facing.
Pin together around all the rough edges.
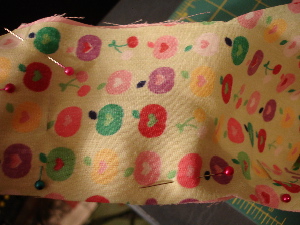
Sew around the whole perimeter of the bag. You can clip the curvy bits if you’d like. (I forgot on this bag-oops!)
Step Nine:
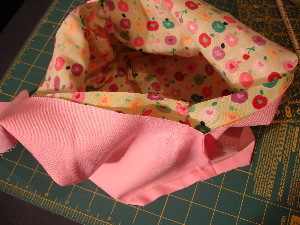
Remove pins and prepare yourself for the best part of bag making! Turn the bag right side out through the hole in the lining. Poke out the handle tips with a pointy object like scissors or a pencil. Sew hole shut by hand or use the lazygal method of topstitching as I do.
Step Ten:
Topstitch around the outside of your lunch bag. (not strictly necessary)
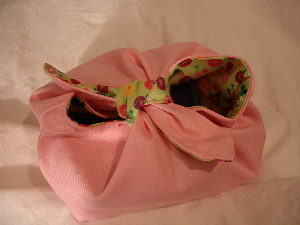
And VOILA! (as we say here in Canada…also I suppose in parts of Europe and Africa. And French Guyana.)
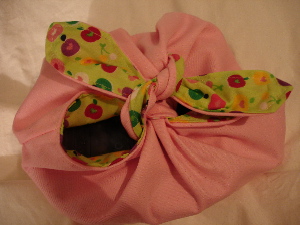
A nifty, easy to wash plastic bag substitute. Lunchtime!
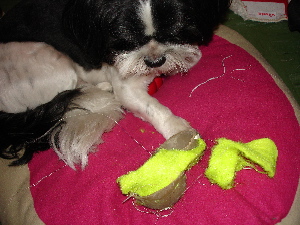
And this is my dog with the tennis ball he chewed up while I was making this tutorial.
28 comments:
what a great idea! I will be trying this later this week. maybe even tonight as I have to make a door prize for a teacher gift :)
super cute lunch bag! I am adding it to my list of things to make! Good luck with the sew mama sew contest!
fantastic tutorial. can't wait to try it out!
Thanks! This is my first time doing something like this so if there is anything confusing, please let me know!
Congratulations on winning the contest. This looks like a fun thing to make, I'm going to try it this week,when I get some sewing time!
I have been trying to come up with a solution for each member of my family to replace the plastic - and this is PERFECT!!! Will be making these in fabrics to fit each person.
Congrats on your win - this was a great tutorial!
this looks great, I'll going to have to try one. congrats on your win!
Congrats on your win! I love this tutorial and was hoping it would be one of the winners... One question for you--did you just use cotton fabrics or did you use oilcloth? Would it work with both? Thanks again for sharing this tutorial.
I love this tutorial.. would even make a great 'take along project baggie'..
thanks and congrats on your win from the SMS blog!
Lissa
Australia
who just shared your link with her net friends...
Hi Sarah,
I just used cotton fabric. The pink is a twill and the inside is a quilting cotton. I think oilcloth might be too stiff and might not tie properly. I figured that a leaky lunch tends to find its way out onto your most important papers no matter what the bag is made of! :o)
Thanks everyone for your support!
LOVE this idea! For some reason having a sweet lunch bag makes going to work more fun! Thanks
I love this idea to use it for my kid's school bag. I always need more space to put all the sheets and blankets for his naps at school so I think this will be a lovely and easy idea!
Thanks for the tutorial. Very easy and turned out pretty cute. I used linen for the outside and vintage tablecloth for the inside. I am using these for mother's day gifts!
Thanks again!
Glad to hear it worked well! I'd love to see pictures- if anyone posts one let me know.
I LOVE LOVE LOVE this pattern - it is so simple! I have made 2 so far, and will post a pic of the first one on my blog (http://thequeenbeesbuzz.blogspot.com/) in a few minutes, with a few comments about how I did it.
thank you so much! i just made this bag and it only took me 2 hrs!
thank you
thank you so much! i just made this bag and it only took me 2 hrs!
thank you
I love your bag and made mine recently. You can find it here : http://latelierdepondy.canalblog.com/archives/2009/03/09/12874777.html
Thank you for your pattern ! I put your link in my post, hope it's OK.
I love this bag. Thanks for the very clear tutorial! I made one and put it on my blog with a link back here at : http://ssg212.wordpress.com/
I will give it to my mother to take to her new job!
Hi there!
i have link ur tutorial in http://diybaglover.blogspot.com/.
Hope u dont mind =)
Hi, I read this tutorial about an hour ago and I now am the proud owner if a Square(ish) Bottomed Hobo Lunchbag! I loved it so much and it was just so simple I had to make one. Of course as a SAHM I don't have any use for it. But I figure I will let my two year old use it to carry toys for now, and if my mom likes it I will make her one for work.
I wanted to thank you for the tute though, it was very well done and I just love this lunch bag!
Lovely project!
I will try to make a similar one! :D
Laura from Italy
Your work is wonderful! Absolutely love it! thanks for the tutorial!
YAY! I made one, too. Thanks for such a clear tutorial. It worked great.
Here is mine: http://weddingdressblue.wordpress.com/2011/09/17/fnsi-report-very-satisfying/
great bag.. gonna make it asap.. :) and your dog is super-cute too.. ;)
Thank you for this! I made 2 of these today, one in the size you made as a gift for a friend that is coming to visit tomorrow from far away, and one for me that is a little deeper for my long days that require more than 1 meal on the go. I LOVE how they turned out and I'm sure my friend will too :)
Wow, this is sweet! I was looking for somethin like this, im gonna make a bunch of them for sure! Only im going to line mine with something waterproof in case of spills...
I can not figure out step six for the life of me.. could you explain a bit more?
Post a Comment